Resources
FogBoxer is a Unity asset that empowers the creation of synthetic image generation and the associated annotations needed to feed a machine learning algorithm to train an object detection algorithm.
Tutorial 1 | Snapshots Mode
1. Open Unity Hub (2019.4.1 LTS or higher).
2. Make a new project using the 3D template.
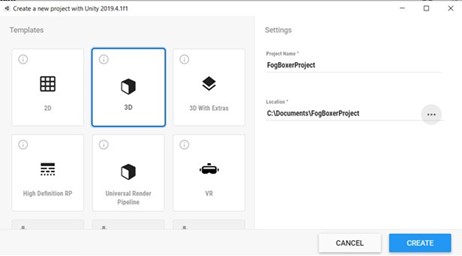
3. Import a 3D model into Unity.
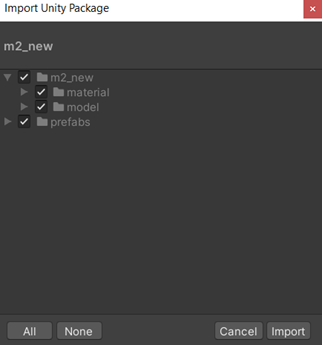
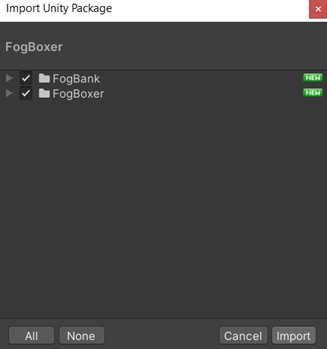
4. Import FogBoxer into Unity.
5. Drag 3D model into Scene View.
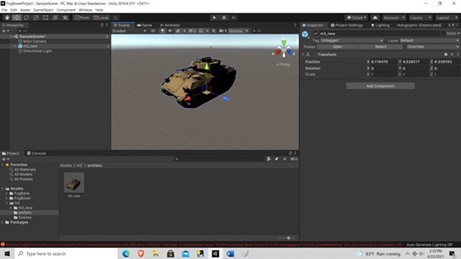
6. Add Layers “NameOf3DModel” “NameOf3DModelFlat.”
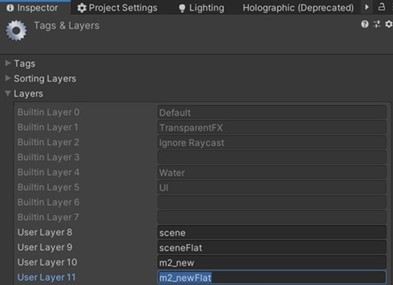
7. Add FogBoxer component to Main Camera.
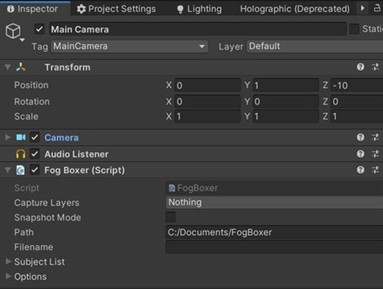
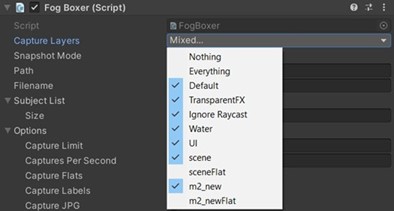
8. Set Capture Layers to exclude any flat layers.
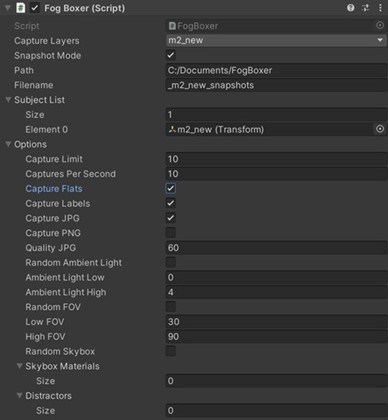
9. Set FogBoxer settings and drag 3D model from Hierarchy to Inspector > Fog Boxer > Subject List > Element 0.
10. Add TransformRotateMouse and TransformPositionPOV components to Main Camera (gives first person controls in Game View when Play button is pressed).
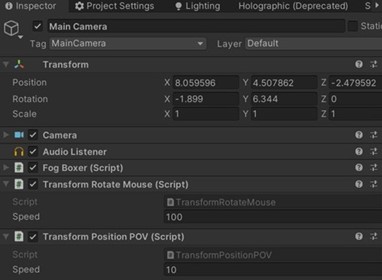
11. Press Play, click on Game View, use WASD/Arrows and mouse to move and look. Press spacebar to take snapshots of 3D model. After 10 shots the session will end and look like the screen below, signaling that Capture Limit has been reached and photoshoot is complete.
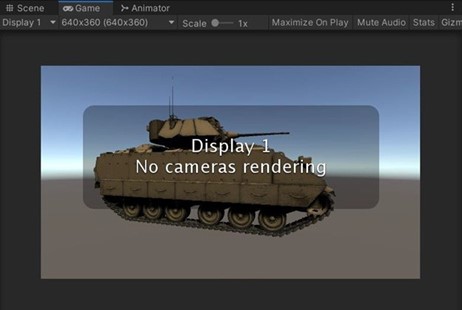
12. Review generated synthetic data.

13. Repeat, create automated capture algorithms, etc. as necessary.
Tutorial 2 | Scenery, Distractors, Occlusion
In the FogBoxer folder of the Project View, there is a prefab called “Cube.” This prefab has the ability to be spawned dynamically by the FogBoxer component as a “distractor.” In addition, the structure of the Cube prefab yields a template for more complex scenery that should provide occlusion just by virtue of existing in the scene.

The structure of the Cube prefab is shown below. The first thing to note is that it is on Layer: “scene.” It is mostly a generic cube primitive, with the exception of the Transform Scale Random, Transform Position Random, Texture Random, and Transform Rotate Random Angle components (from Fog Bank). These components allow the Cube prefab to spawn with random properties every frame, adding some domain randomization to captured images.
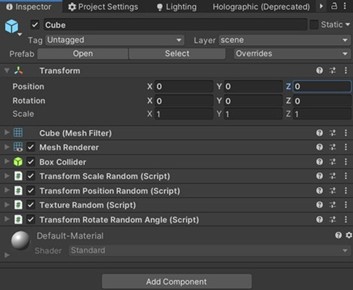
If the Cube prefab is examined (by double clicking the prefab in the Project View), a child of the primary Cube prefab is visible. It is the child object that provides occlusion calculation capability. Notice that the child (also called “Cube”) is on Layer: sceneFlat.
![FB Image Needed[1090]](https://www.fogboxer.com/wp-content/uploads/2021/12/FB-Image-Needed1090.png)
FogBoxer provides 10 “Flat Materials” intended to represent various layers that must be captured separately and also occlude each other in a single frame. For example, if we wanted to capture three different types of vehicles that all might be in the same frame, and calculate occlusion from vehicle to vehicle as well as scene to vehicle, we would use four different Flat Materials. FogBoxer will use n Flat Materials based on the size of the subject list. Therefore, any scenery/distractors should use Flat Material n + 1. The number of Flat Materials (and Layers) can be expanded if necessary.
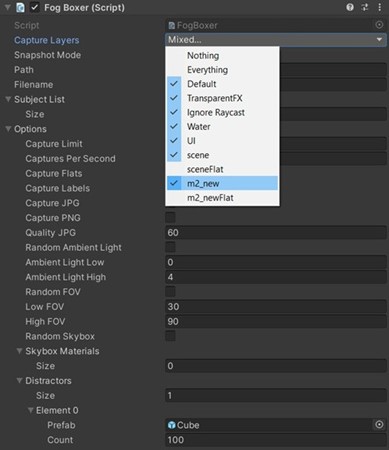
To assign distractors to FogBoxer, simply expand the Options list, expand the Distractors list, set the size of the Distractors list, drag the Cube prefab onto the Prefab slot, and set the count. In the example below, 100 new Cube prefabs will be spawned each frame. The Cube prefab itself is responsible for the randomization of each Cube distractor that is spawned.

Finally, be sure to set the Capture Layers field of FogBoxer so that it ignores any flat layers you are using. If this step is not followed, then flat layers will show up in captured images.
Tutorial 3 | Algorithmic Capture
To capture images with FogBoxer automatically, simply uncheck “Snapshot Mode” on the FogBoxer component and after Play is pressed in the Unity Editor, it will start capturing every n interval, based upon the Captures Per Second field on the FogBoxer component, until the Capture Limit is met. To make things interesting, leverage the Transform manipulation components provided in the Fog Bank folder. We will provide a simple example here of a flat rotation about a subject.
1. Start with an empty scene.
2. Drag the FogBoxer component onto the “Main Camera” game object.
3. Drag a 3D model or prefab into the scene, at position 0, 0, 0.
4. Create an Empty GameObject at position 0, 0, 0.
5. Rename the new GameObject to “Pivot.”
6. Add a TransformRotateAroundLocal component to the “Pivot” game object.
7. Set the Speed field to 1 and the Axis field to 1 of the TransformRotateAroundLocal component.
8. Drag the “Main Camera” game object onto the “Pivot” game object.
9. Set the position of the “Main Camera” game object to 0, 0, -10.
10. Set the appropriate fields on the FogBoxer and associated Camera components (see Tutorial 1).
11. Make sure Layers and Flat Materials are correct (see Tutorial 2).
12. Push Play and…BRAVO! You have now initiated a simple form of automated algorithmic capture.
13. Experiment with new patterns, camera angles, backgrounds, scenery, occluders, etc. to find a set of images that works for your needs.
List of Components
For the sake of efficiency, we will focus on components specific to FogBoxer here. FogBoxer.dll provides the direct interface to FogBoxer.
FogBoxer (Basic)
(Should be attached to a GameObject that has a Camera component.)
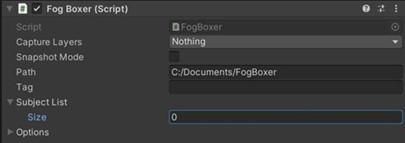
Without expanding the Options list, FogBoxer contains the following features:
Capture Layers – LayerMask that defines which layers the camera (attached to the same game object as this script) can see and render.
Snapshot Mode – A boolean that defines whether the spacebar will be used to manually capture images and annotations while in Play mode.
Path – The top-level path to which associated image and annotation files will be saved.
Tag – Text that will be appended to the name of the Subject when the image and annotation files are saved.
Subject List – Up to 10 Subjects that will be captured in the same frame.
FogBoxer (Advanced)
(Should be attached to a GameObject that has a Camera component.)
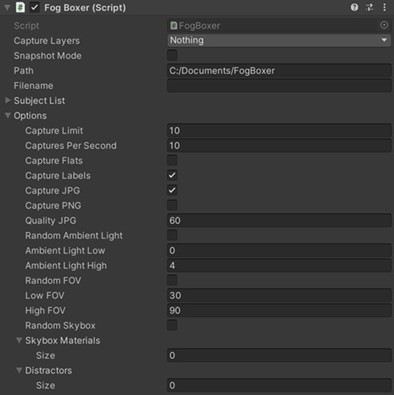
The FogBoxer Options list adds the following features:
Capture Limit – The number of images to capture.
Captures Per Second – Defines how often captures will be taken.
Capture Flats – A boolean defining whether the flat imagery responsible for bounding box and occlusion calculations should be generated.
Capture Labels – A boolean defining whether the annotation files should be generated.
Capture JPG – A boolean defining whether training images should be in .jpg format (cannot capture .jpg and .png simultaneously).
Capture PNG – A boolean defining whether training images should be in .png format (cannot capture .jpg and .png simultaneously).
Quality JPG – If Capture JPG is checked, this defines the quality at which the .jpg image will be saved.
Random Ambient Light – A boolean that defines whether Unity’s ambient lighting will be randomized.
Ambient Light Low – If Random Ambient Light is checked, this defines the lowest possible ambient light that will be set.
Ambient Light High – If Random Ambient Light is checked, this defines the highest possible ambient light that will be set.
Random FOV – A boolean that defines whether the Camera component attached to the same GameObject as this FogBoxer component will feature randomized FOV (field of view).
Low FOV – If Random FOV is checked, this defines the lowest possible FOV of the Camera.
High FOV – If Random FOV is checked, this defines the highest possible FOV of the Camera.
Random Skybox – A boolean that defines whether a random skybox will be chosen every frame.
Skybox Materials – If Random Skybox is checked, FogBoxer will choose and display from this list of Skybox Materials at random per frame.
Distractors – A list of prefabs and an associated count that will be injected into each frame to provide occlusion and/or distraction to the main Subject. Distractors are to be prefabs that contain their own components to define behavior. FogBoxer merely spawns them per frame at a certain count. See the included “Cube” prefab contained in Assets > FogBoxer.
FAQs
A) Set the size of your Game View to the desired output image size.
A) Be sure that you have created layers for your model.
A) Simply uncheck “Snapshot Mode” on the FogBoxer component and FogBoxer will auto-capture every n interval based upon the Captures Per Second field on the FogBoxer component until the Capture Limit is reached.
Feel free to use Fog Bank Transform components to craft your own custom camera motions/algorithms/patterns.
A) There is an example of an occluding object called “Cube” in Project View > FogBoxer. It would need its own layers (for example, Cube and CubeFlat). The Cube example also comes pre-fitted with autonomous placement components.
A) Similar to an occluding object, any “scenery” can be placed on a “scene” layer. In addition, a “sceneFlat” layer should be created. Duplicate the scenery GameObject(s) (best to place them under one root object), set the duplicate(s) to the “sceneFlat” layer, and then add a MaterialBulkOverride component to the root object that will represent the “sceneFlat” layer.
Assign a Flat Material from Project View > Assets > FogBoxer > Resources > FlatMaterials to the MaterialBulkOverride component.
Currently, there are only 10 Flat Materials, and these must account for any subjects, distractors, and scenery that will be used for bounding box or occlusion calculations.
